Skip navigation

Category Archives: How to

Cron Script

Ever need to complete the same mundane task on a daily basis? If so, Cron is for you! Cron can make your life easier by scheduling those mundane tasks to be ran automatically. Cron is a daemon and runs in the background of basically every Linux based system.

Update: Continuing our journey into the magical world of open source software I would like to expand on my home security tutorial. A wonderful person by the name of Morgan Storey has made a few scripts available, to automate the mundane process of activating motion when you leave and help clean up after Motion. Here are the scripts if you would like to use them.

Step One: How to configure cron?

To start off the configuration file for cron is call crontab. This is where the cron daemon checks to see what needs to be done, to check if crond (cron daemon) is running type ps aux | grep crond into the terminal. Check if crond is returned in the results, if not you can start cron by adding the line crond to one of your start up scripts.

Now lets create our first scheduled task. Start off by typing crontab -e into terminal, please note I’m using nano as the default text editor on my system.

Here is an ASCII repartition of how the scheduling system works in cron. The command is stated at the right of the time to be executed.

# +---------------- minute (0 - 59)
# |  +------------- hour (0 - 23)
# |  |  +---------- day of month (1 - 31)
# |  |  |  +------- month (1 - 12)
# |  |  |  |  +---- day of week (0 - 6) (Sunday=0 or 7)
# |  |  |  |  |
  *  *  *  *  *  command to be executed

For example if you want an entry to be executed at 12PM every monday you would;

0  12  *  *  1  /command_directory/executed_command

Each line represents a seperate crontab entry.

The asterisk (*) is a wild-card meaning I want the entry above to be executed no matter the day or month.

Step Two: How to create a shell script?

To make cron, even more, useful you should know how to create a shell script (groups of commands).

A shell script is basically a group of commands that work together towards a common goal. Lets say we wanted to make a script that deletes the contents of a few folders. We would make the script look similar to this;

#!/bin/bash
# Simple folder delete
rm ~/samplefolder/*
rm ~/samplefolder2/*
echo "Folders deleted!"

A shell script can even execute multiple commands at the same time by using a double ampersand (&). For example;

#!/bin/bash
# Simple folder delete
rm ~/samplefolder/* && rm ~/samplefolder2/*
echo "Folders deleted!"

For more information on creating shell scripts there is a very nice tutorial on the Ubuntu Forums; here.
Ever wanted to be able to check in on your house while you were away?  is a piece of open source software that enables your webcams, that you may have laying around the house, work as motion detectors. Motion should run on most linux distributions but for this tutorial, I’m using the desktop version of  linux.

Requirements

  • PC with Ubuntu installed
  • USB webcam(s)
  • 30-90 minutes of free time

Step One

Okay lets start off by downloading the linux driver for your webcam. This great man wrote a single driver that is compatible with about 260 different webcams! You can download it here, to your desktop preferably. If this driver does not work for your camera please search  for the right driver.

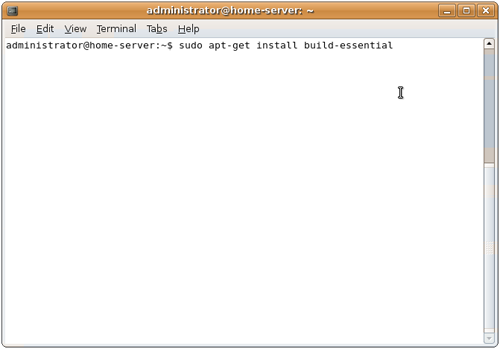
Once you’ve downloaded the driver we can start compiling it, but first make sure you have the package build-essential installed you can do so by typing in sudo apt-get install build-essential into the terminal, information on this package can be located here.

Build-essential

We are now ready to start compiling the source code for the driver. Once we extract the .tar.gz file by right-clicking on it and selecting Extract Here. This should take a few seconds to complete.

Then open up terminal again and type in cd ~/Desktop/gspcav1-20071224, then type ./configure, this should take a minute or two (don’t worry if this gives out errors, just precede to compiling).

After that, start compiling it by typing in make. After it’s been compiled you can install it by typing in sudo make install this will install the package. You should now have a webcam that is recognized by linux now!

Step Two

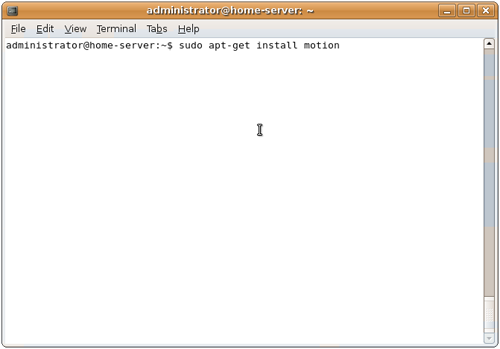
Ubuntu has added Motion to the repository so it is now super easy to install (no compiling required). All you need to do to install Motion is, type sudo apt-get install motion in the command line.

sudo apt-get install motion

Step Three

It’s now time to setup Motion’s configuration files. You can download my config files that I’ve already filled in; here (read through the entire motion.conf file and change the settings to fit your needs).

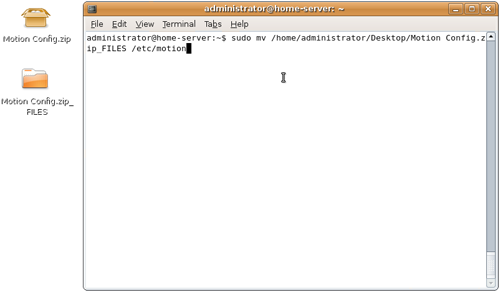
Put the files in the Motion Config.zip file in your /etc/motion/ folder on your server by first extracting the files onto the desktop, then typing sudo mv ~/Desktop/Motion Config.zip_FILES /etc/motion/ into the terminal.

sudo mv motion config

Please note: that if you have more than one webcam you will need one thread.conf for each extra cam (example; thread0.conf, thread1.conf, thread2.conf) You will also need to add the links to these files at end of the motion.conf file.

Step Four (optional)

Wput is a command line FTP client that allows you to upload security photos to a remote FTP server. To install this type sudo apt-get install wput into the terminal. We can configure Motion to use wput to upload photos that have been taken by adding

# Command to be executed when a picture (.ppm|.jpg) is saved (default: none)# The filename of the picture is appended as an argument for the command.on_picture_save wput ftp://USERNAME:PASSWORD@REMOTE SERVER %f

to your motion.conf file (if your using the motion.conf I provided this is already in there, just replace the server info in the ftp:// section)

Step Five

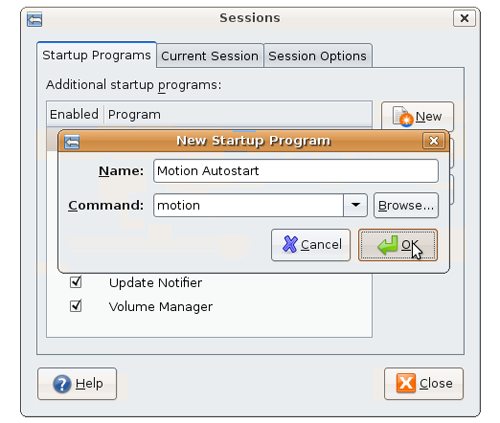
Lets make Motion startup automatically with the computer. Open “System” from the menu bar on the top of the screen, then “Preferences,” and “Sessions.” Create a new startup program type in a name for it and then type motion in the command section. Click “OK.” You can now restart the computer.

Motion Autostart

Configuration

If you need more information about getting Motion running visit; here. There is also a ton of configuration options. From taking movies instead of photos, to launching a script when motion is detected; here. A wonderful person by the name of Morgan Storey has made a few scripts available, to automate the mundane process of activating motion when you leave (via screensaver) and help clean up after Motion (deleting old security photos locally and over FTP). Here are the scripts if you would like to use them.

Conclusion

You should now be able to open a web interface for Motion now by typing in localhost:8000 from the server itself or XXX.XXX.X.XXX:8000 from another computers web browser. To view a live stream of your webcam type localhost:8001 from the server itself or XXX.XXX.X.XXX:8001 from another computers web browser. You can change settings from this interface here too, you can even make Motion generate it’s own config files to fit your setup exactly!

Enjoy your new home-brew security system! All thanks to  and all the other great open source developers. Keep up the great work!

Leopard Built-in VNC Client

I’ve been using “Chicken of the VNC” for about 6 months in Tiger. Although “Chicken of the VNC” is a great app I have noticed that the development has been halted for over 2 years now.  With the advent of OS 10.5 Leopard Apple has choice to include a VNC client although not in the most obvious location. Here is how to use it.

1. Press Command (Apple) + K2 from Finder.

2. Type in “vnc://server.ip.address.here”

It should connect without a problem. It even has auto-rescaling built-in. Enjoy.